How I Run This Site
It's a well-worn cliché that developers overthink how to host their personal blogs, and I'm no exception to that. Web developers are a lucky bunch; if you gave us a pile of static HTML files and tolds us to edit them manually to maintain a website, we would get along just fine. That would be practical, but not very fun. And most of us aren't running personal websites out of necessity—we're doing it because it's fun! Developers want their websites to be complicated, because a personal website is a low-stakes place to experiment with new ideas and show them to the world.
A Brief History of my Website
Throughout the years, my personal website has been a reflection of my professional interests:
-
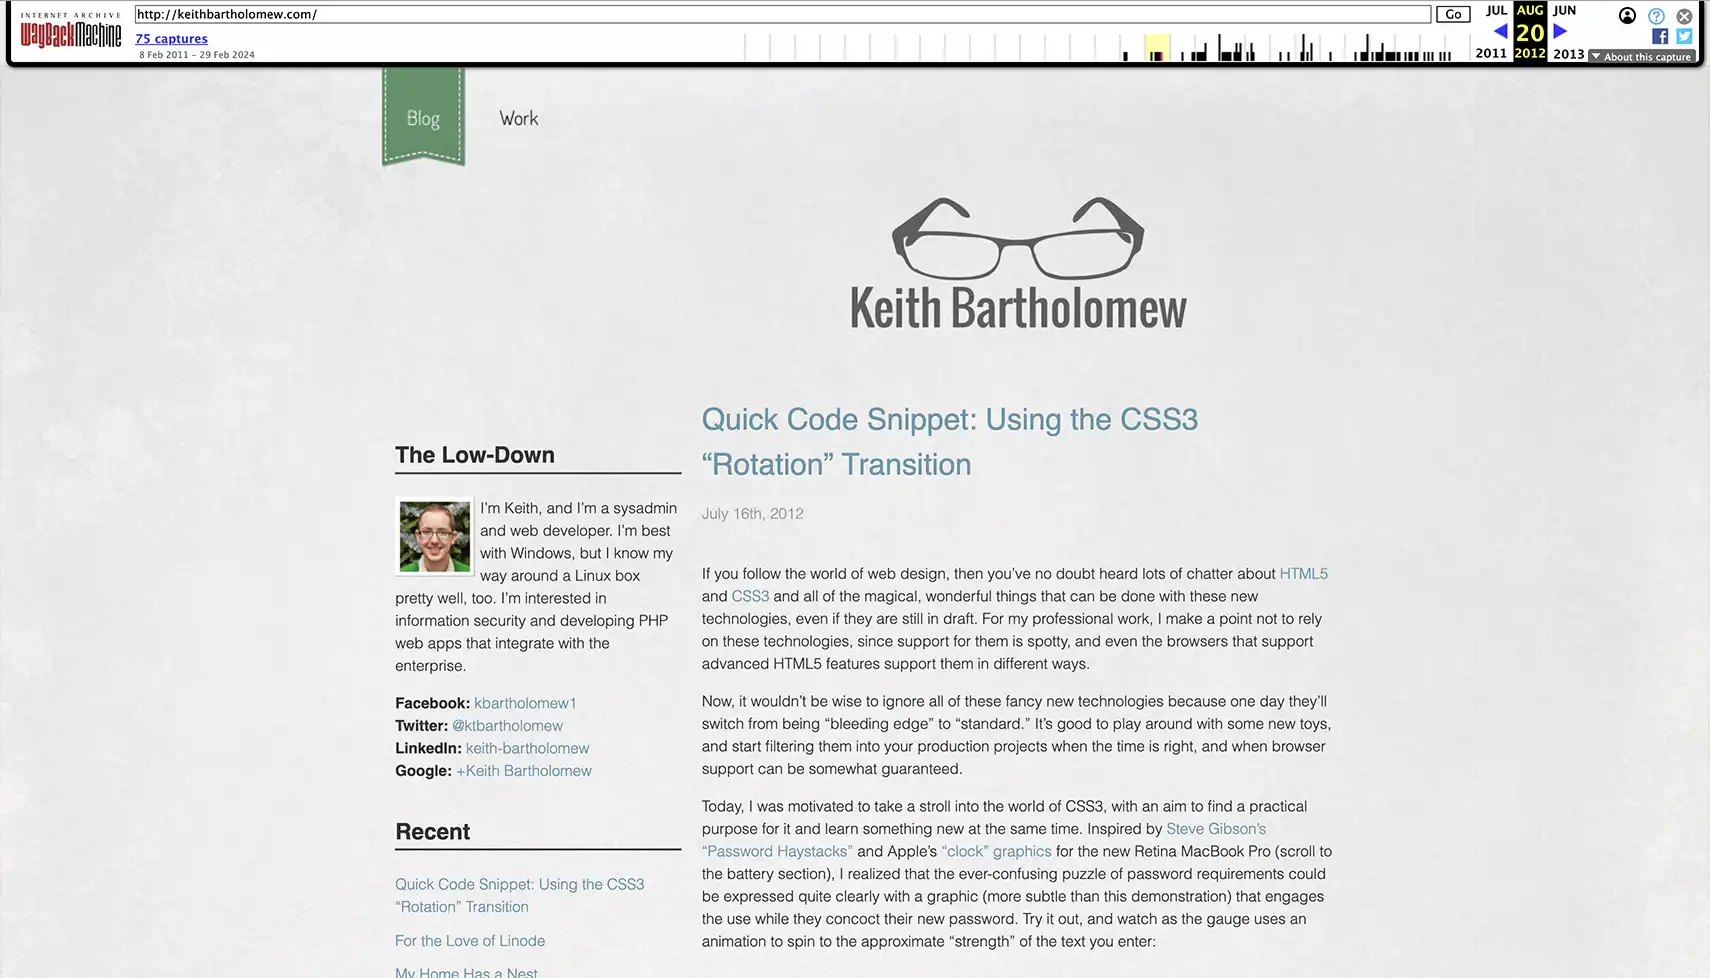
2010: A combination of a hand-written PHP site and a WordPress blog which I decided should be brown for some reason. I bragged about my experience with jQuery and AJAX. The Wayback Machine didn't capture this version of the site very well, but I remember that I had traced a photo of myself in Adobe Illustrator to appear as a cartoon-like effigy of myself at the top of every page.
-
2012: I redesigned the WordPress blog and expanded it to handle the entire site. I was doing lots of tiny web development posts and demos, much like I'm doing now.

-
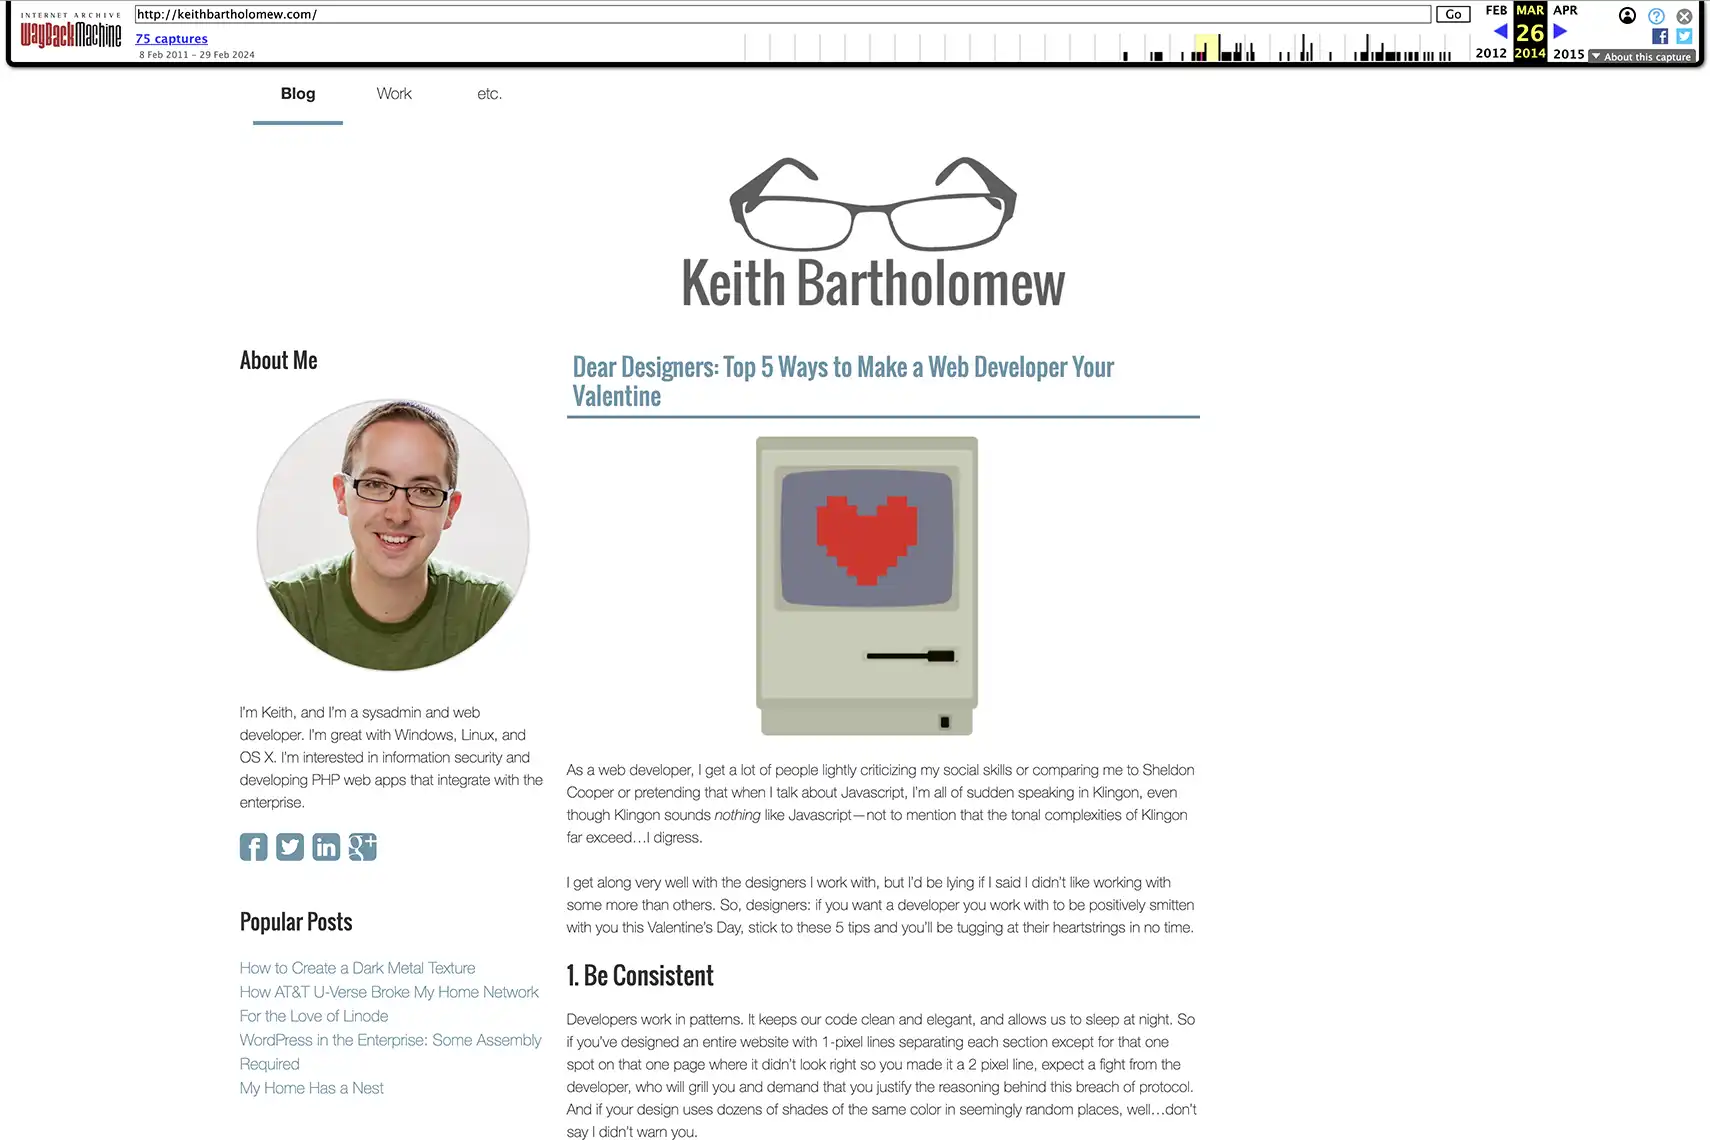
2013-2016: I somehow resisted the urge to completely redesign my website, only giving it a minor style refresh (skeuomorphism was going out of style around this time). The biggest change during this time was that I migrated all the content to the ExpressionEngine CMS. I was growing tired of trying to make WordPress work well as a generic CMS and wanted to give a "real" CMS a try. The experience landed me a job at an agency that specifically wanted ExpressionEngine experience, so I guess it worked!

-
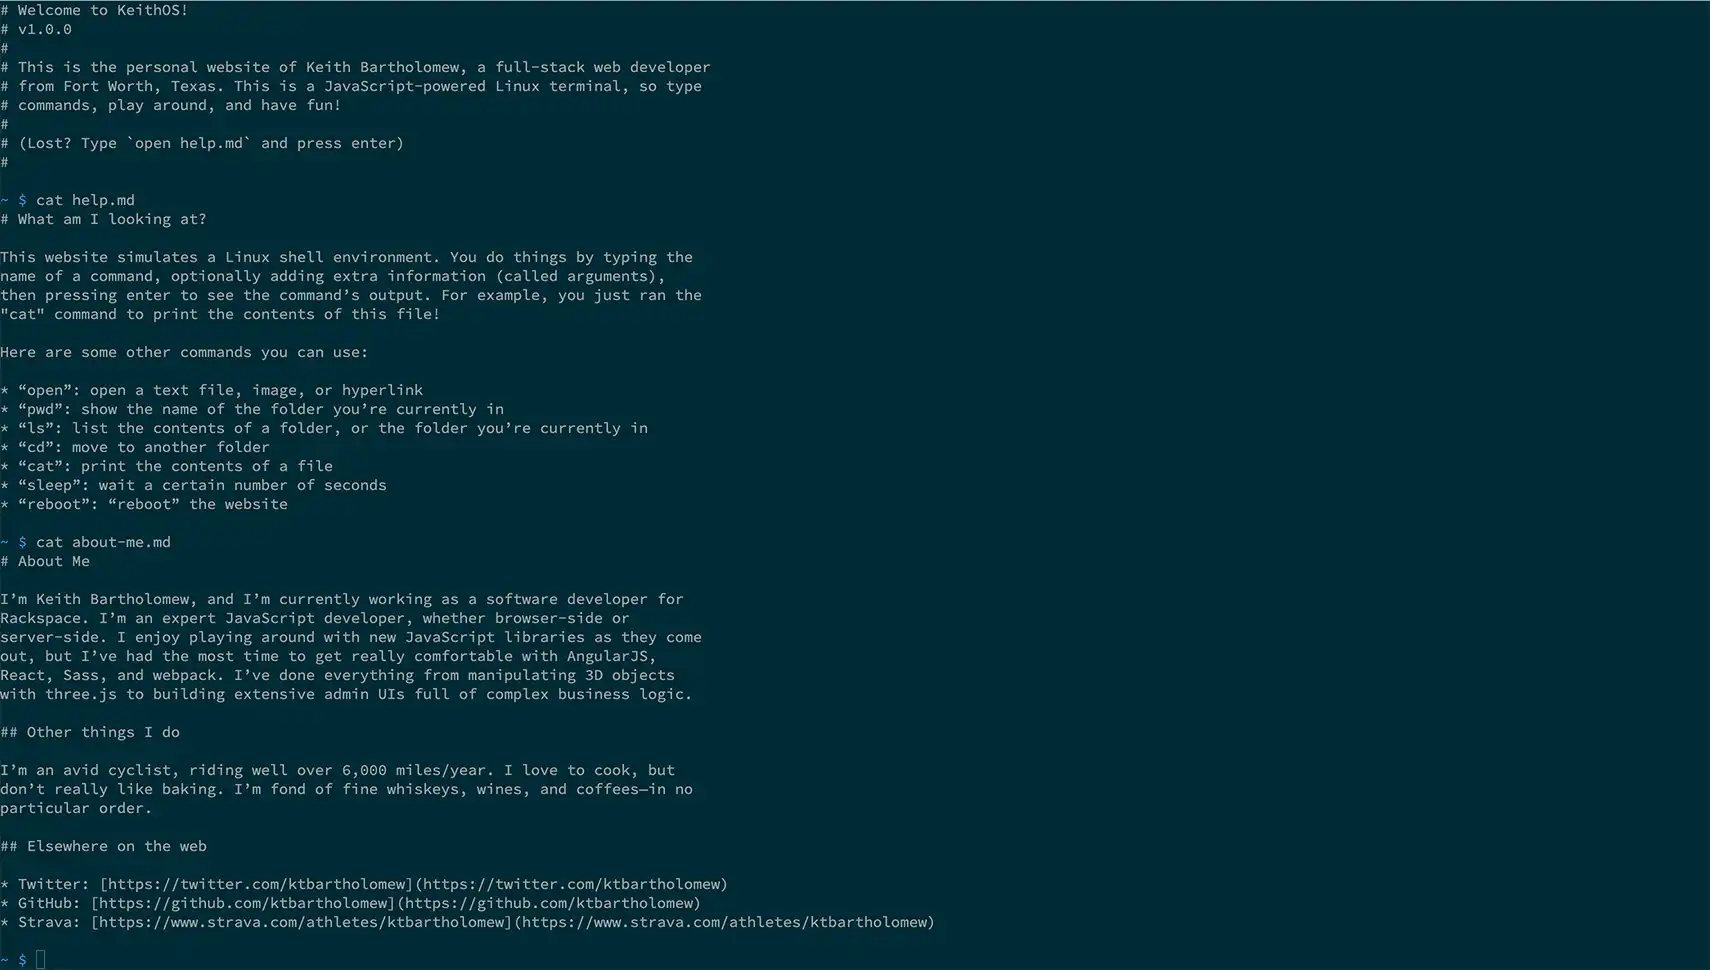
2018-2023: A mostly functional bash terminal emulator written entirely in JavaScript. Around this time I was less interested in blogging and more into development and systems work, probably managing Kubernetes clusters. I wanted my website to be more of a calling card, letting my work on GitHub speak for itself. Instead of making anything resembling an actual website, I made a full-screen terminal emulator using xterm.js and a bash-like terminal that I wrote from scratch. You
lsto list files,catfiles to read them, oropenthem to open links in a new tab or view images and markdown in a modal. You can evenrebootto reload the website!
I'm still very proud of how this iteration of my website turned out, but the single-page, interactive nature of it made me all but disappear from search engine results, leaving my arch-nemesis Keith Bartholomew from the University of Utah as the most findable Keith on the Internet.
-
2023-present: Next.js, prerendered as a static site. I wanted to keep the terminal emulator look-and-feel, but have something that behaved more like a traditional website. As I mentioned in "Back to Blogging", I wanted to get back into writing because I noticed that many of the professional software developers I look up to are prolific writers.
The Frontend Stack
This is a Next.js site. I'm using the output: "export" setting to bundle the entire thing as static HTML files so I can host it on any static-site platform at nearly zero cost. My blog posts are all Markdown (MDX) files, and I use a small collection of packages to parse them and their frontmatter and scaffold out navigation for the site.
Next.js is a borderline boring decision to make in 2023. I could have used an even more boring static site generator like Jekyll, but Next.js gives me the opportunity to pivot this static site into more interactivity if I want to do that in the future. It's also what I'm using at work right now, so I'm very comfortable with it.
I'm using Tailwind to manage the styling. A big hurdle there was writing a bunch of @apply expressions with regular CSS selectors to apply the Tailwind utilities to the content in my blog posts, which usually get rendered without any inline styling.
The Hosting Stack
I made the boring decision with Next.js and Tailwind, so I had some room to be slightly less boring with the hosting. Hosting static websites is incredibly easy these days. Netlify, Vercel, GitHub Pages, and CloudFlare Pages will all serve static sites with a custom domain for free, with zero effort on my part.
But where's the fun in that?
My website has always been a way for me to experiment with my professional interests, and these days my interests are shifting more towards infrastructure, specifically on AWS. Boutique static hosting providers aren't always a great fit for large companies...can I build a similar experience using AWS?
AWS Amplify
I gave AWS Amplify a shot at first…it works well with both static and dynamic sites, and has integrations that let you add custom domains and distribute the site behind a CDN like CloudFront. However, I found that the only way to deploy a site to AWS Amplify is using their proprietary build system. This build system was a little difficult to use, and very expensive (you pay per minute of build time). In just a few days of testing, I had already racked up a bill larger than what I wanted to spend to host the site for an entire month.
Amplify is still an interesting product for applications that absolutely need server-side behavior, but it wasn't a good fit for my static-site needs.
CloudFront and S3
The obvious AWS tools for a static site are CloudFront and S3. Given how simple and common this use case is, I'm surprised at how much work it is to get a working site using them.
AWS recently announced the CloudFront Hosting Toolkit which is a CLI that claims to make this a lot easier.
After building my site with npx next build, I get a folder named out/ that contains all of the HTML, CSS, JavaScript, and images that my site needs. I then upload them to an S3 bucket under a prefix that includes the current Git commit SHA. This keeps the files from each individual build isolated, which lets me control when I start serving a new version to visitors. It also makes it easy to roll back a change, because I still have a complete set of files from each previous version.
I have a CloudFront distribution that uses the S3 bucket as an origin. Because my files are uploaded to S3 under random prefixes, I configure the origin path to use the same prefix as whichever version I want to serve.When I publish a new version of the site, I update the origin path to the new version's commit SHA.
This simple connection of CloudFront and S3 mostly works, but there's still an important gap: if I try to view a path like /blog/, most intelligent web servers know to serve the file /blog/index.html. S3 is not this intelligent. To work around this, I created a Lambda@Edge function that appends index.html to requests that don't already include a file extension. This isn't perfect (what if you wanted to load a file without an extension?) but it works well enough for me.
DNS and TLS
The common way to use a custom domain with CloudFront is to make a CNAME record from your domain to the distribution's domain. Because my website doesn't have any prefixes like www in front of it, it's called the "domain apex" and most DNS providers won't let you create a CNAME as the domain apex.
Route 53, the AWS DNS service, has a workaround: you can make records that are aliases to other AWS resources, including the domain apex record. So I used Route 53 to create a record named keithbartholomew.com that is an alias to my CloudFront distribution. This means that when DNS clients request my domain, it resolves directly to the IP addresses of the CloudFront distribution!
$ dig keithbartholomew.com

; <<>> DiG 9.10.6 <<>> keithbartholomew.com
;; global options: +cmd
;; Got answer:
;; ->>HEADER<<- opcode: QUERY, status: NOERROR, id: 34313
;; flags: qr rd ra; QUERY: 1, ANSWER: 4, AUTHORITY: 0, ADDITIONAL: 1

;; OPT PSEUDOSECTION:
; EDNS: version: 0, flags:; udp: 1232
;; QUESTION SECTION:
;keithbartholomew.com.          IN      A

;; ANSWER SECTION:
keithbartholomew.com.   20      IN      A       108.156.211.90
keithbartholomew.com.   20      IN      A       108.156.211.65
keithbartholomew.com.   20      IN      A       108.156.211.7
keithbartholomew.com.   20      IN      A       108.156.211.52
Managing TLS certificates has gotten a lot easier since LetsEncrypt rocked the world in 2015. Getting automatically-renewed certificates for free is pretty much expected these days, but some providers make it easier than others.
Luckily, because my DNS is hosted by Route53, AWS Certificate Manager (ACM) is able to automatically integrate with it to validate my ownership of the domain, issue, and perpetually renew a certificate for my website. It also attaches easily to the CloudFront distribution!
Serverless Functions
I don't have a reason to use this right now, but I have also configured an API Gateway as a dynamic origin to supplement my static site. I might use this for a contact form or something in the future.
If you visit https://keithbartholomew.com/functions/cloudfront-origin-test, CloudFront will forward your request to the API Gateway, where a simple Lambda will tell you where you're from.
The location data is derived from CloudFront's viewer data, which isn't always reliable. You might get told that your location is
undefined!
The Deployment process
It's all open source!. I use GitHub actions to build the Next.js site, upload the contents to S3, then deploy a CloudFormation stack that configures everything I've described above.